To help with that,I'm going to give a quick paintover to give Andrea some help on his portrait.
First of all this protrait is really off to a good start in general- the big shapes are all blocked in well and it has a believable mass . I think with just a few adjustments we can push this in the right direction. Here's some areas I would recommend addressing:
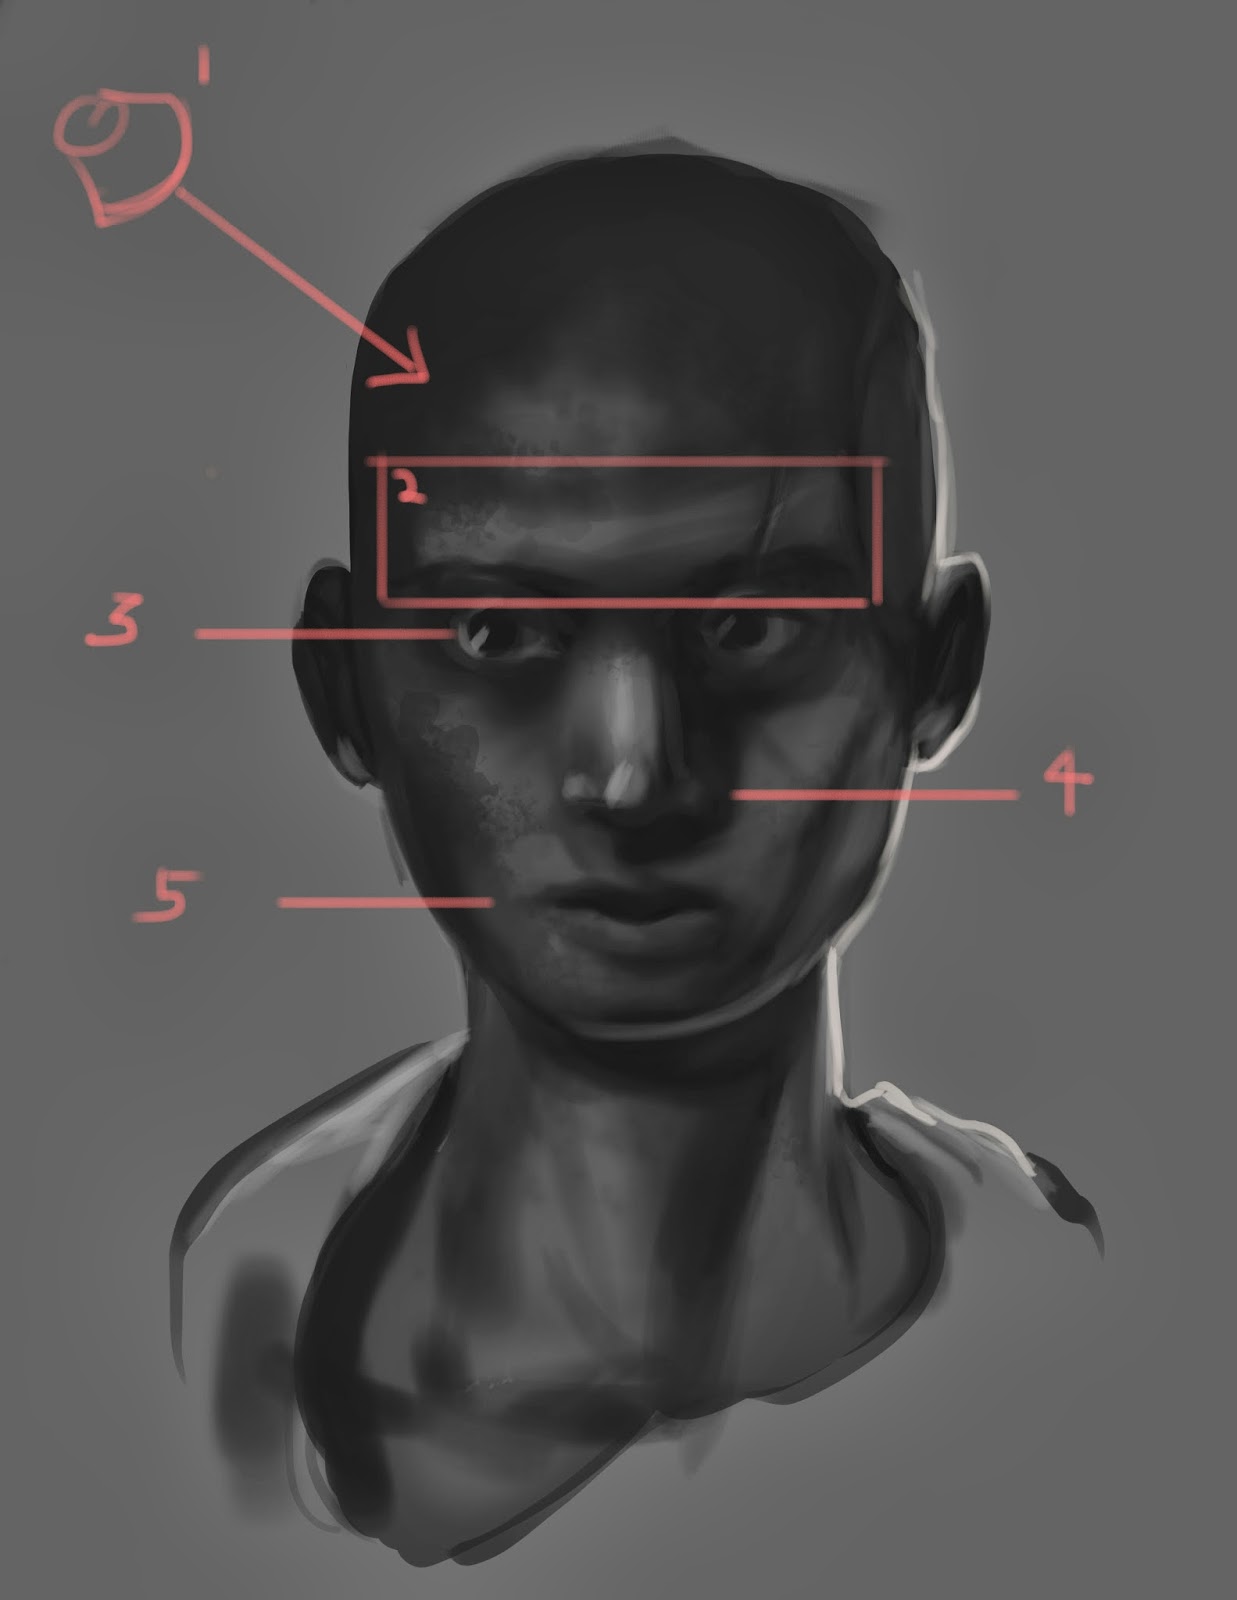
1. the light could use another pass to make it a bit more cohesive- judging from the shadow on the nose, I placed the light source for us to define the forms a bit more.
2. on a young person, generally the brow ridge is not this pronounced- we will flatten this down a bit
3. We can push the eyes a bit larger to feel a more age appropriate-remember younger people will generally have larger eyes.
4. Generally a child of this age will probably have a shorter less pronounced nose bridge-certain ethnicities or face types may actually be in this range, but based on the reference, I'm going to adjust things into a more baseline look. Also, we can probably shorten it in general just a bit.
5. the mouth could use a bit of refinement, and we'll move it up a bit as well as a result of shortening the nose
1. Lighting-at this stage simply thinking of the skull area as a large sphere will be enough to bring the shape into focus-also bringing the light down into the cheeks will help tie the face together

2. We can push the brow ridge down by hitting it with more light, particularly in the area between the eyes

3. Just a small adjustment on the eye size will really change the entire look of the face- this is a good trick in general when you're contructing faces


5. Finally, some anatomical clean up on the mouth, after moving it up slightly

Here's the end result (after adding a hairline)-although this may not necessarily be the desired finished look, hopefully this demo should help you to push things closer to your intended result

Let me know if this is helpful for you!
Thanks, Jim! It's always great to get some insight into your processes, and also it's really helpful to have a "guide" to come back to here! It will be nice to get the demo videos up at some point too so we can always go back and watch your steps and accompanying wise words. :)
ReplyDeleteThat's incredibly useful, thanks a lot Jim!
ReplyDeleteAwesome Jim !! u got it man !!!
ReplyDelete